Shipping Box to Canada: Your 2026 Guide
When you're shipping a box to Canada, success is about more than just slapping a label on it. You need to get the customs paperwork right, pick a carrier that makes sense for your budget and timeline, and—most importantly—keep your customer in the loop.
Getting these pieces right is the key to a smooth delivery and a happy Canadian customer.
Why Shipping to Canada Is a Major Ecommerce Opportunity
It’s easy to lump Canada in with all your other international shipping destinations, but that's a huge mistake. For any growing ecommerce brand, our northern neighbor represents a massive, dialed-in audience that’s actively looking to buy from US stores. This isn't just about adding another country to your list; it's about tapping into a thriving digital economy that’s right on your doorstep.
The numbers don't lie. The Canadian parcel shipping market is an economic powerhouse, valued at roughly USD 106.4 billion. Back in 2022, shipping demand shot up by a staggering 17.6%. Better yet, ecommerce revenue in Canada is on track to grow by 9.80% annually through 2029. You can dig into more of these shipping trends over at eShipper.com. This sustained growth is exactly why a seamless post-purchase experience—from clear communication to easy order edits—is non-negotiable for building customer loyalty.
Turning Logistics into a Growth Engine
Stop thinking about Canadian shipping as just another cost. It's time to see it for what it really is: a powerful engine for winning and keeping customers. When you nail the delivery experience, you build the kind of trust that turns a first-time Canadian buyer into a long-term advocate for your brand.
This guide is designed to shift your mindset. We’re going to walk through the practical, no-fluff steps you need to take to make shipping a box to Canada a simple and profitable part of your operation. It’s all about making smart choices that help your bottom line and strengthen your customer relationships.
Here’s the bottom line: A great shipping experience is a great marketing tool. When a Canadian customer gets their order quickly and without any surprise fees, they’re far more likely to shop with you again and tell their friends about it.
Understanding the Broader Trade Landscape
To really make a dent in the Canadian market, it helps to understand the bigger picture. Getting familiar with the key Canadian importers and exporters can give you some incredible insights into market demand and even open doors to new partnerships. It helps you see where your brand fits in the larger commercial flow.
And if you’re running on Shopify, you’ll want to build out your international strategy the smart way. For more on expanding your reach without blowing your budget, take a look at our guide on how to sell internationally on Shopify. It’s the perfect companion to the Canada-specific tactics we’re about to cover, giving you a complete playbook for growth.
Getting Your Paperwork Right for Canadian Customs
If there's one place where international shipping goes wrong, it's customs. I've seen it a hundred times: a simple paperwork mistake is the number one reason packages get stuck at the border, leaving you with angry customers and a logistical nightmare.
Think of your customs forms as a passport for your products. Every single detail has to be spot-on for your box to get a smooth entry into Canada.
This flow chart gives you a bird's-eye view of the entire process, from your warehouse to your happy Canadian customer.

As you can see, a well-prepared package is the first critical link in the chain. So let's get that part right.
The Must-Have Documents for Your Canadian Shipments
Your most important piece of paper is the Commercial Invoice. This is the document the Canada Border Services Agency (CBSA) uses to understand everything about your shipment: what's inside, who sent it, where it's headed, and its value.
For bigger shipments valued over CAD $2,500, you might also need a formal Canada Customs Invoice (CCI). But honestly, for the vast majority of e-commerce orders, a perfectly filled-out Commercial Invoice is all you'll need.
Let’s walk through a real-world example. Say you run an apparel store on Shopify and someone in Toronto buys a t-shirt and a hoodie.
Here’s exactly what you need to put on that Commercial Invoice:
- Shipper/Exporter Info: This is you. Your business name, address, and phone number.
- Consignee/Importer Info: This is your customer. Get their full name, address, and phone number. A typo here is a classic reason for failed deliveries.
- Full Product Description: Don't be vague. "Clothing" won't cut it. You need to be specific, like "1x Men's Cotton T-Shirt, Blue" and "1x Unisex Fleece Hoodie, Black." This helps the customs agent quickly confirm the contents and move it along.
- Quantity: The number of each item.
- Unit & Total Value: The price the customer actually paid for each item (don't include shipping costs here).
A word of warning: Never, ever lie about the value of your goods to try and dodge duties. The CBSA is incredibly good at spotting undervalued items. Getting caught means hefty fines, your products being seized, and your business getting flagged for future shipments. It’s just not worth the risk.
Decoding HS Codes
The Harmonized System (HS) Code field often trips people up, but it's simpler than it looks. It's just a universal code used by customs officials everywhere to classify products. Getting this code right is crucial because it directly determines the duties and taxes applied to your items.
Let’s go back to our apparel order:
- A cotton t-shirt is typically HS Code 6109.10.
- A fleece hoodie would likely be 6110.30.
You don't have to memorize these. You can find the right code using free lookup tools on government trade websites or right within your shipping carrier's software. Taking a minute to find the correct code prevents your package from being held for re-classification, which is a common cause of major delays.
What You Absolutely Cannot Ship to Canada
While you can ship most e-commerce products, Canada has a very strict list of prohibited and restricted items. Trying to send these will get your package seized and could land you in hot water.
Here are a few common no-gos for e-commerce sellers:
- Firearms and Ammunition: These are highly regulated and not something you can ship through standard carriers.
- Certain Foods, Plants, and Animals: To protect local agriculture, things like fresh fruit, meat products, and even soil are generally forbidden without special permits.
- Counterfeit Goods: Shipping fakes is illegal. Period. Your goods will be destroyed, and you could face legal trouble.
- Obscene Materials: Anything considered obscene under Canadian law is strictly prohibited.
On top of that, some items are simply restricted, meaning they need special handling or paperwork. Think about perfumes or nail polish—they're often classified as dangerous goods because they're flammable. You'll need specific labeling and carrier approval to ship them by air.
Before you ship anything you're unsure about, do a quick check on the CBSA's official list and your carrier's guidelines. It’s a simple step that can save you a world of trouble, lost inventory, and a damaged reputation.
Choosing the Right Carrier for Canadian Shipments

Picking the right carrier to ship a box to Canada isn't just about finding the cheapest rate. It’s a strategic choice that directly hits your profit margins, your customer’s experience, and frankly, your own sanity. The big names—USPS, UPS, FedEx, and DHL—each bring something different to the table.
Your real goal isn't to find the one "best" carrier, but to find the right carrier for the job at hand. What’s perfect for shipping a lightweight t-shirt will be all wrong for getting expensive electronics to a customer in a remote territory like Yukon.
USPS: The Go-To for Budget-Friendly Shipping
For a lot of Shopify stores, especially those new to Canadian cross-border selling, the United States Postal Service (USPS) is the natural starting point. The main draw? Price. It’s hard to beat, especially for smaller packages.
- USPS First Class Package International: This is your best friend for anything under 4 lbs. Think apparel, small accessories, or cosmetics. It’s usually the most affordable option, but you're trading cost for speed. It can be slow, and tracking can get a little spotty once it crosses the border.
- USPS Priority Mail International: When your package is over 4 lbs or you just need it there a bit faster, this service strikes a nice balance. Tracking is more reliable, and the price is still competitive.
The biggest headache I see with USPS is the surprise brokerage fees. Once a package is handed off to Canada Post and it’s over a certain value, the customer often gets a bill for brokerage charges on top of duties and taxes. This is a quick way to create a bad customer experience if they aren't expecting it.
UPS and FedEx: The Ground Shipping Powerhouses
UPS and FedEx are the titans of logistics for a reason. They have massive, reliable ground and air networks reaching every corner of Canada. When you ship with them, you get solid, detailed tracking that gives both you and your customer peace of mind.
Their ground services, like UPS Standard and FedEx International Ground, are incredibly popular for sending a box to Canada. They offer a dependable and fairly priced option for shipments that aren't time-sensitive. The catch, however, is that these ground services are notorious for tacking on separate brokerage fees billed directly to your customer unless you pre-arrange payment.
Need it there faster? Their Express and Expedited services are fantastic, though they do cost a premium. A huge advantage here is the ability to ship Delivery Duty Paid (DDP). This means you cover all duties, taxes, and fees upfront, creating a totally seamless, "no surprise" delivery for your Canadian customers. To see how these two giants compare on international routes, check out our in-depth analysis of DHL vs FedEx.
DHL Express: The All-Inclusive Premium Choice
When speed and customer experience are non-negotiable, DHL Express is often the clear winner. International shipping is their entire business model, and it really shows in their service.
With DHL, brokerage fees are typically rolled right into the shipping cost. This means they breeze through customs, and your customer never gets hit with an unexpected bill on their doorstep. This all-in-one approach makes DHL a stellar choice for high-value orders or for any brand that wants to deliver a premium, hassle-free experience. The rates might look higher at first glance, but the value is in the speed and simplicity.
Comparing Major Carriers for Shipping a Box to Canada from the US
Choosing a carrier involves balancing speed, cost, and the customer experience you want to provide. Here’s a quick breakdown to help you compare your main options for US-to-Canada shipments.
| Carrier | Best For | Typical Speed (Business Days) | Brokerage Fees Handling | Pros & Cons |
|---|---|---|---|---|
| USPS | Lightweight, low-value items (under 4 lbs) | 6–20+ | Handled by Canada Post; recipient pays on delivery | Pro: Most affordable for small items. Con: Slower transit, surprise brokerage fees for the customer, less detailed tracking. |
| UPS | General purpose, reliable ground delivery | 2–7 (Ground), 1–3 (Express) | Recipient pays on Ground services unless DDP is selected | Pro: Strong tracking, reliable network, DDP options available. Con: Ground service brokerage fees can frustrate customers. |
| FedEx | Fast delivery and time-sensitive shipments | 2–7 (Ground), 1–3 (Express) | Recipient pays on Ground services unless DDP is selected | Pro: Excellent tracking, speed, and reliability, DDP options. Con: Can be pricier, similar brokerage fee issues as UPS on Ground. |
| DHL | Premium, hassle-free international shipping | 1–3 | Typically included in the upfront shipping cost | Pro: Very fast, brokerage included, great customer experience. Con: Generally the most expensive option. |
Ultimately, no single carrier is perfect for every shipment. The savviest approach is to offer a mix of options at checkout. Let your customers decide if they want to pay more for speed or save money with a slower service. This flexibility is key to winning and keeping your Canadian buyers happy.
Mastering Duties and Taxes for a Better Customer Experience
Nothing sours a great purchase faster than an unexpected bill. When you're shipping a box to Canada, the biggest point of friction isn’t usually a delay—it’s the surprise invoice for duties, taxes, and brokerage fees that shows up on your customer’s doorstep. Getting a handle on these charges is absolutely essential for keeping your Canadian customers happy.
These costs are just a normal part of cross-border commerce. Let's break down what your customer is being asked to pay:
- Duties: Think of these as tariffs the Canadian government applies to imported goods. The amount depends on the product's value, where it was made (country of origin), and its specific HS code.
- Taxes: Your Canadian customers have to pay taxes just like they would on a domestic purchase. This includes the federal Goods and Services Tax (GST) and, depending on the province, either a Harmonized Sales Tax (HST) or a Provincial Sales Tax (PST).
- Brokerage Fees: This is the service fee a carrier like UPS or FedEx charges to manage all the customs paperwork and pre-pay the duties and taxes on your customer’s behalf.
The key to a smooth delivery—versus a customer service nightmare—is deciding upfront who is going to pay these fees, and when.
The Big Decision: DDP vs. DDU
As you configure your shipping settings, you’ll hit a fork in the road: do you ship Delivery Duty Unpaid (DDU) or Delivery Duty Paid (DDP)? This single choice will completely define what happens after your customer clicks "buy."
Delivery Duty Unpaid (DDU), which you might also see called Delivered at Place (DAP), is the default for many new cross-border sellers. With DDU, your customer pays you for the product and shipping, and that's it. The responsibility for all duties, taxes, and surprise brokerage fees falls on them, payable when the package arrives. It seems simpler on your end, but it's often a recipe for a terrible customer experience.
Delivery Duty Paid (DDP) flips the script. You take full responsibility for all import costs. At checkout, you collect the duties and taxes from the customer, giving them a single, all-inclusive total. You then handle remitting the fees to the carrier. The result? The package lands on their doorstep with nothing more to pay.
My Takeaway: From the customer's perspective, DDP makes an international purchase feel completely domestic. There are no surprise bills, no packages held hostage at a depot, and no confusing invoices from the courier. It removes all the anxiety and friction from buying from a US-based store.
A Real-World Scenario: The $100 Order
Let's walk through what happens when a customer in Ontario buys a $100 pair of sneakers from your Shopify store. See how differently this plays out with DDU versus DDP.
The DDU Nightmare
First, the customer pays you $100 for the shoes plus $15 for shipping. Their total at checkout is $115. They think they're done.
Days later, the delivery truck arrives. But instead of a package, the driver hands them a bill. The carrier has already paid the customs fees and has added their own hefty brokerage fee for the trouble. Now, the customer is told they owe another $35 before they can get their shoes.
Suddenly, that $100 purchase feels like a 30% price jack. Best case, they pay it and are unlikely to ever shop with you again. Worst case? They refuse the shipment, leaving you with a costly return and a scathing one-star review warning other Canadians to stay away.
The DDP Dream
Your checkout, using a Shopify app or direct carrier integration, calculates everything instantly.
The customer sees a completely transparent breakdown: $100 (sneakers) + $15 (shipping) + $20 (duties & taxes). The grand total is $135. They pay the full amount, knowing for a fact that this is the final price.
A few days later, the sneakers are delivered directly to their door. No friction, no surprises.
That kind of transparency is how you build trust. By showing the total landed cost, you're treating your Canadian buyers with respect and giving them the confidence to finish the purchase. The final price might be the same, but the experience is worlds apart. Offering DDP is one of the most powerful moves you can make to win in the Canadian market.
Optimizing Your Post-Purchase Operations
Getting a shipping box to Canada is about more than just picking a carrier and filling out customs forms. For any Shopify store doing serious volume, the real magic happens in your post-purchase workflow. This is where you can cut down on operational headaches, prevent costly mistakes, and even bring in more revenue.
The goal is simple: shift from a reactive support model where you’re constantly putting out fires to a proactive, automated system. It saves your team a ton of time and, just as importantly, creates an experience that truly wows your Canadian customers and keeps them coming back.
Stop Delivery Failures with Real-Time Address Validation
We’ve all seen it happen. A single typo in a Canadian postal code can send a package on a wild goose chase, only for it to end up back on your warehouse doorstep. For international shipments, these delivery failures are a financial drain—you’re on the hook for return shipping, reshipment fees, and sometimes even lost inventory.
The single best way to head this off is with real-time address validation right at checkout. As a customer starts typing, a tool powered by something like Google Maps can instantly:
- Auto-complete their address with verified options.
- Flag typos in street names or postal codes as they type.
- Confirm the address is a real, deliverable location in the carrier’s network.
This one step catches the vast majority of address errors before an order is even submitted. For any merchant shipping regularly to Canada, this isn't a nice-to-have; it's a foundational tool for preventing packages from getting lost in the system because of bad data.
Empower Customers with Self-Service Order Edits
But even with validation, mistakes can slip through. A customer might suddenly realize they typed in their old apartment number or decide they want the package sent to their office instead. In most stores, that triggers a frantic email to your support desk, starting a race against the clock to catch the order before it’s fulfilled.
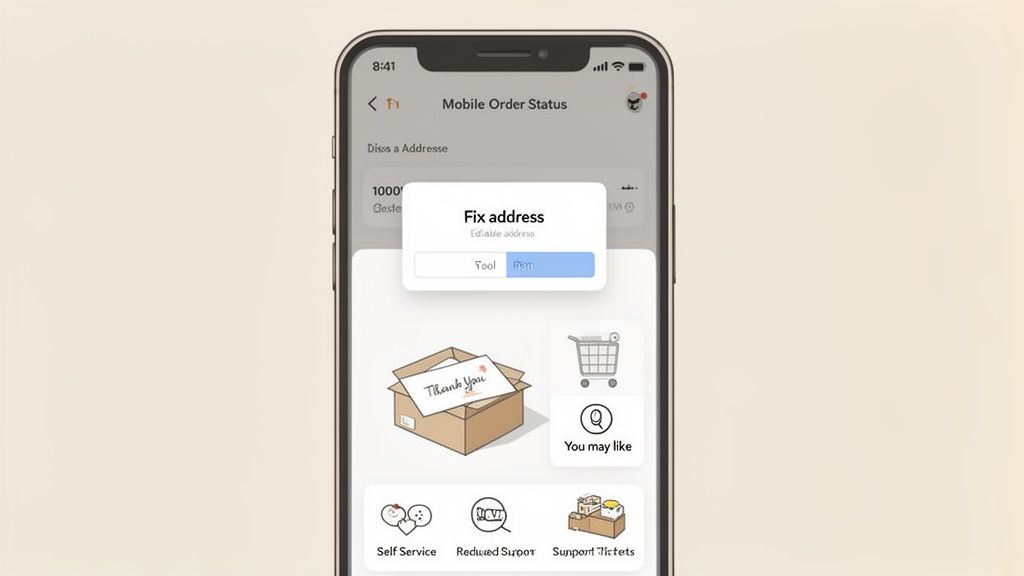
There’s a much smarter way. Give customers a self-service portal to fix their own mistakes.
Here’s the flow: a customer places an order and gets a confirmation email with a link to their personal order status page. On that page, a small widget gives them the power to edit their shipping address or contact info. The key is that this option is only available for a limited time window you set—maybe the first 30 or 60 minutes, before your fulfillment team ever sees the order.
By putting the customer in control, you empower them to solve their own problem instantly. This not only cuts down on support tickets but also builds customer confidence and satisfaction. They get the fix they need without having to wait for a reply.
The Canadian delivery network is incredibly efficient. Some logistics partners manage to deliver millions of parcels a year with a 99.4% first-attempt delivery success rate, getting packages to major cities in just 2 to 4 days. That leaves very little room for error. When Canadian households are receiving an average of 165 to 167 packages annually, letting customers manage their own order details is a huge part of hitting that high bar and meeting expectations. You can learn more about how these figures shape Canadian e-commerce logistics.
Turn Your Order Status Page into a Profit Center
The Thank You page and the Order Status page are two of the most undervalued pieces of real estate in all of e-commerce. Think about it: your customer’s attention is at an all-time high. They're excited about their purchase and fully engaged. This is the absolute best time to show them a post-purchase upsell.
Instead of just displaying a tracking number, you can use these pages to offer products that complement what they just bought. Picture this:
- A customer in Toronto just ordered a new winter coat.
- While checking their delivery status, they see a small offer on the page: "Add these matching gloves to your order for 20% off. No extra shipping."
- With a single click, the gloves are added to their existing, unshipped order.
Suddenly, a standard cost center—your post-purchase experience—becomes a new revenue stream. You’ve just increased your average order value without spending a dime on marketing. To pull this off, you need a solid system that integrates with Shopify to handle these one-click order modifications and inventory updates. For a deeper dive into the tools that enable this, check out our guide on choosing the right track package software.
By weaving together address validation, customer self-service, and smart upsells, you completely transform your operations. Shipping a box to Canada becomes less about managing problems and more about creating a smooth, profitable, and customer-first experience from the moment they click "buy" to the moment the package arrives at their door.
Common Questions About Shipping a Box to Canada
Even with the best plan, a few questions always pop up when you start shipping across the border. Let's walk through some of the most common ones we hear from sellers who are new to sending packages to Canada.
What Is the De Minimis Value for Canadian Shipments?
This is a number you absolutely need to know. The de minimis threshold is the magic value below which a shipment can enter a country without incurring duties and taxes. For Canada, that value is CAD $20.
If the total value of your shipment is CAD $20 or less, it will typically clear customs without your customer being charged anything extra. It's a simple, important rule.
However, there's a huge advantage if you're shipping from the US under the Canada-United States-Mexico Agreement (CUSMA). When you use a courier like UPS, FedEx, or DHL, the thresholds get a lot more generous:
- Shipments up to CAD $150 are free from customs duties.
- Shipments up to CAD $40 are free from sales taxes (like GST/HST/PST).
So, if your package is valued between CAD $40 and CAD $150, your customer won't pay duties, but they will still be on the hook for the relevant sales taxes.
How Should I Handle Returns from Canada?
A clunky or expensive return process is one of the fastest ways to lose a Canadian customer for good. You need a clear, simple policy. The good news is, you have a couple of great options.
Many brands find success by partnering with a Canadian third-party logistics (3PL) provider. This gives your customers a local Canadian address to send returns to. The 3PL can then gather these returns and ship them back to you in a single, consolidated shipment, saving you a fortune on shipping.
Pro Tip: Your return policy for Canadian orders needs to be front and center on your website. Be transparent about who pays for return shipping and what the process looks like. Answering these questions upfront in an FAQ prevents a lot of headaches down the road.
Another route is to offer prepaid return labels directly through your carrier. While this is a direct cost you'll absorb, the convenience for your customer is a powerful way to build brand loyalty.
What's the Best Way to Calculate Shipping Costs to Canada?
Guessing on international shipping costs is a surefire way to either lose money or scare off customers with high estimates. The best practice is to use a real-time rate calculator at checkout, which is a standard feature on platforms like Shopify and many of its apps.
These tools connect directly to your carriers in real-time to pull the exact shipping cost based on:
- The customer's postal code.
- The total weight of their order.
- The dimensions of the shipping box.
This ensures you and your customer are only paying the true cost. If you prefer a simpler approach, you can always set up flat-rate shipping tiers. For instance, you might offer $15 shipping for all orders under $100 and free shipping for anything over that.
Do I Need Special Boxes to Ship to Canada?
You don't need any kind of official, government-approved box. But that doesn't mean you should just grab any old box off the shelf. International shipping is a rough ride.
Always choose sturdy, high-quality cardboard boxes that can handle being tossed around and stacked under heavier packages. You also want a box that's the right size for your product—too much empty space invites damage, even with packing filler. Using quality essential moving boxes and packing supplies is a small investment that protects your products and keeps your customers happy.
And remember, carriers use dimensional weight for pricing. Shipping a lightweight item in a giant box can trigger surprisingly high surcharges. Pack it right, pack it tight, and make sure your products are snug with plenty of bubble wrap or packing paper.
At SelfServe, we believe a great post-purchase experience is your best tool for growth. Our app empowers your customers to fix their own address typos and lets you add one-click upsells, turning a potential support headache into a new revenue stream. See how you can reduce support tickets and lift your average order value by starting your free trial at https://getselfserve.com.