Getting a Shipping Label: A Practical Guide for 2026
An order enters fulfillment, the address looks almost right, and someone clicks Create label before the customer notices the missing apartment number. A few minutes later, the parcel has a tracking number, the warehouse queue has moved on, and support is left explaining why an address change may now require a carrier intervention or a replacement shipment.
Getting a shipping label is easy when the destination, package details, carrier service, and printer output are all correct. The difficult part is controlling the moment before the label becomes operational. A reliable workflow treats label creation as a validation gate, not as a routine final click.
Why the Shipping Label Moment Matters
At 9:14 a.m., a customer messages support to say the apartment field on an order is wrong. At 9:42 a.m., the warehouse has already generated the label against the incomplete address. The support agent can still see the order, but the fulfillment process now has momentum in the wrong direction.
That small timing gap creates three problems. The carrier may require the label to be voided and reissued, the agent has to spend time investigating whether the parcel has entered the network, and the customer may miss the expected delivery window. A label isn't just a printed address. It carries the shipment's tracking identity and becomes part of the post-purchase record.
USPS's Click-N-Ship history guidance shows how this workflow has evolved. USPS launched Click-N-Ship in 2002, allowing consumers and small businesses to create, pay for, and print labels online rather than relying on a post office counter. Its later shipping-history features let users reprint labels, save them as PDFs, recreate frequently used labels, and request refunds for unused labels. USPS also notes that some records remain available for a year in archived history.
Practical rule: The customer-edit cutoff should happen when the warehouse generates the label, not when the order is first placed.
That rule turns a common support problem into a controlled workflow. Give the buyer a short self-serve window to correct a unit number, street spelling, phone number, or delivery instruction. Once the warehouse begins label generation, freeze the relevant fields and make the exception path visible to support.
The label itself also needs operational context. Parcel documentation may include handling or hazard information, so teams should keep a clear distinction between shipping data and package notices. A resource such as Warning Labels and Stickers is useful when fulfillment staff need the right physical markings alongside the carrier label.
The rest of the process comes down to choosing the right creation channel, validating the destination before payment, selecting an output format the printer can handle, and keeping a fallback for orders that can't be printed at home.
Creating Labels Directly With USPS, UPS, and FedEx
Carrier-direct tools fit operations that mainly use one network, need access to carrier-specific services, or want to avoid another application. They create more manual work when orders come from several channels and staff must compare rates, copy addresses, or synchronize tracking.
USPS Click-N-Ship
At USPS.com, open Click-N-Ship and select Create Label. Enter the domestic destination, including the apartment or suite, weigh the parcel, and choose a service that matches the delivery promise. Depending on the shipment, you can add insurance or signature confirmation before payment.
Review the address before buying. A short post-purchase edit window gives the customer time to correct a unit number or street spelling, while the warehouse can freeze the address when label creation starts. That cutoff prevents a customer edit from creating a mismatch between the order and the printed label.
USPS provides a downloadable label and supports formats such as PDF, TIFF, SVG, JPG, ZPL203DPI, and ZPL300DPI. Its label tooling also covers address validation, product availability checks, postage calculation, and the required Shipping Services File, as described in the Domestic Labels API documentation. For a standard desktop workflow, a 4-by-6 PDF is usually the simplest output.
UPS shipment creation
UPS shipments can be created in the WorldShip desktop client, a UPS dashboard, or an integrated shipping API. Enter the origin and destination, weight, dimensions, declared value, and service, such as Ground or 2nd Day Air. After confirmation, UPS returns a label with a tracking number and machine-readable barcode information.
Declared value and additional coverage require a deliberate choice. Check the product's value and your claims process before adding protection. For high-value orders, compare the coverage decision with the cost of using a cheaper default service.
FedEx Ship Manager
In FedEx Ship Manager, open Create Shipment, enter the shipment and package details, select a service such as Ground, Express Saver, or 2Day, and review dangerous-goods requirements. The output can be a PDF for a conventional printer or thermal ZPL for a compatible device.
Enter accurate dimensions before comparing carrier services. A light, bulky box can price differently from a compact parcel with the same scale weight. Confirm each carrier's void and refund rules before clicking Pay, because a purchased label may be reversible only within the permitted window, depending on the service and account setup.
Carrier-direct label creation at a glance
| Carrier | Entry Point | Key Screen | Output Format | Typical Void Window |
|---|---|---|---|---|
| USPS | USPS.com Click-N-Ship | Create Label | PDF or supported label formats | Confirm current USPS account rules |
| UPS | WorldShip, dashboard, or API | Package and service screen | PDF or thermal output | Confirm current UPS account rules |
| FedEx | FedEx Ship Manager | Create Shipment | PDF or ZPL | Confirm current FedEx account rules |
Carrier-direct creation suits a focused operation. Once you need shared order queues, marketplace synchronization, or multi-carrier rate logic, a shipping platform can reduce copying, rekeying, and tracking-related support work.
Getting Labels From Marketplaces and Shopify Admin
Marketplace-native labels are built around the order channel's rules. That makes them fast, but it also means the seller is working inside a system optimized for that marketplace rather than for the entire fulfillment operation.
Amazon sellers generally create labels through Shipping Services or Buy Shipping, where available services are rated against approved carrier options. The appeal is operational consistency and the connection between the purchased label, tracking data, and marketplace shipping expectations. If most orders come from Amazon, staying inside Seller Central often avoids unnecessary copying between systems.
On eBay, the Orders tab exposes Print Shipping Label. The seller can review available USPS, FedEx, and UPS options, purchase the label, and have tracking information associated with the order. That is usually the shortest path for a single-channel eBay operation.
Shopify works differently because the admin can serve as a central order workspace. Open Orders, select an unfulfilled order, and use Buy Shipping or an installed shipping application. Depending on the store's setup, the merchant may work with USPS, UPS, DHL, ShipStation, EasyPost, or another connected provider. Insurance selections and shipment details appear within the relevant purchasing flow.
Choosing the channel that fits
Use the marketplace-native tool when speed, channel compliance, and automatic tracking updates matter more than cross-channel control. This is especially practical for a seller whose team spends most of its day in one marketplace.
Shopify admin becomes more useful when orders arrive from the storefront and another channel. It gives the team one place to review fulfillment status, apply a consistent address-validation gate, and send tracking back through the storefront and customer notifications.
| Channel | Label Path | Carriers | When to Pick This |
|---|---|---|---|
| Amazon | Seller Central Shipping Services or Buy Shipping | Approved carrier options | Single-channel Amazon fulfillment |
| eBay | Orders, then Print Shipping Label | USPS, FedEx, UPS | Fast eBay-native processing |
| Shopify | Orders, Buy Shipping, or connected app | USPS, UPS, DHL, and integrations | Multi-channel order management |
Don't choose a channel solely because its first label takes fewer clicks. The better measure is how much re-entry, tracking correction, and support clarification the workflow creates after purchase.
Prepaid and Return Labels, File Formats, and Printers
A prepaid shipping label assigns the shipping charge to the account or payment method selected when the label is created. It works well for outbound orders when the merchant wants the package ready to hand off without asking the recipient to arrange postage. For returns, the label can be placed inside the parcel, emailed after approval, or made available through a scan-based workflow.
The choice affects control. A prepaid outbound label favors speed and a known tracking path, while creating labels later can preserve more flexibility for rate comparison or return authorization. For a deeper explanation of the return use case, see this guide to what a prepaid shipping label is.
The file format should follow the printer, not personal preference. A carrier PDF is suitable for a laser or inkjet printer using adhesive sheet stock. ZPL is designed for compatible thermal printers, while PNG can help when a team needs to place the label into an email or support response.
Label format versus printer type
| Format | Printer | Best For |
|---|---|---|
| Laser or inkjet | Occasional shipments and standard sheet-stock printing | |
| ZPL | Compatible thermal printer | Repeated warehouse printing and automated queues |
| PNG | Thermal or inkjet workflow | Email delivery, previews, or hybrid processes |
Thermal printing becomes more attractive as volume grows because it avoids ink dependence and fits a compact warehouse station. The exact breakpoint depends on staff, equipment, label stock, and batch rhythm, so evaluate the total handling process rather than treating printer type as a universal rule.
Don't resize a carrier-generated PDF in Word or another document editor. Scaling can distort the barcode even when the address still looks readable. If a label must fit a different stock size, change the printer's supported layout or regenerate the label in the required format.
Also recheck package dimensions when a label is recreated for another service. A label generated for one carrier or service isn't automatically suitable for another, and reusing a file without recalculating the shipment can produce a rate or acceptance problem.
Address Validation and Post-Purchase Edits Before You Print
A customer notices a missing apartment number after checkout, while the warehouse is preparing the order. If the label prints first, the correction becomes a carrier change, a replacement label, or a support ticket. A self-serve edit window prevents that error by giving the buyer a defined opportunity to fix the order before postage is purchased.
The workflow needs two controls: customers can correct supported fields before fulfillment, and the system validates the final destination before label creation. Autocomplete helps, but it cannot catch every missing suite, transposed unit number, or incomplete suggestion.
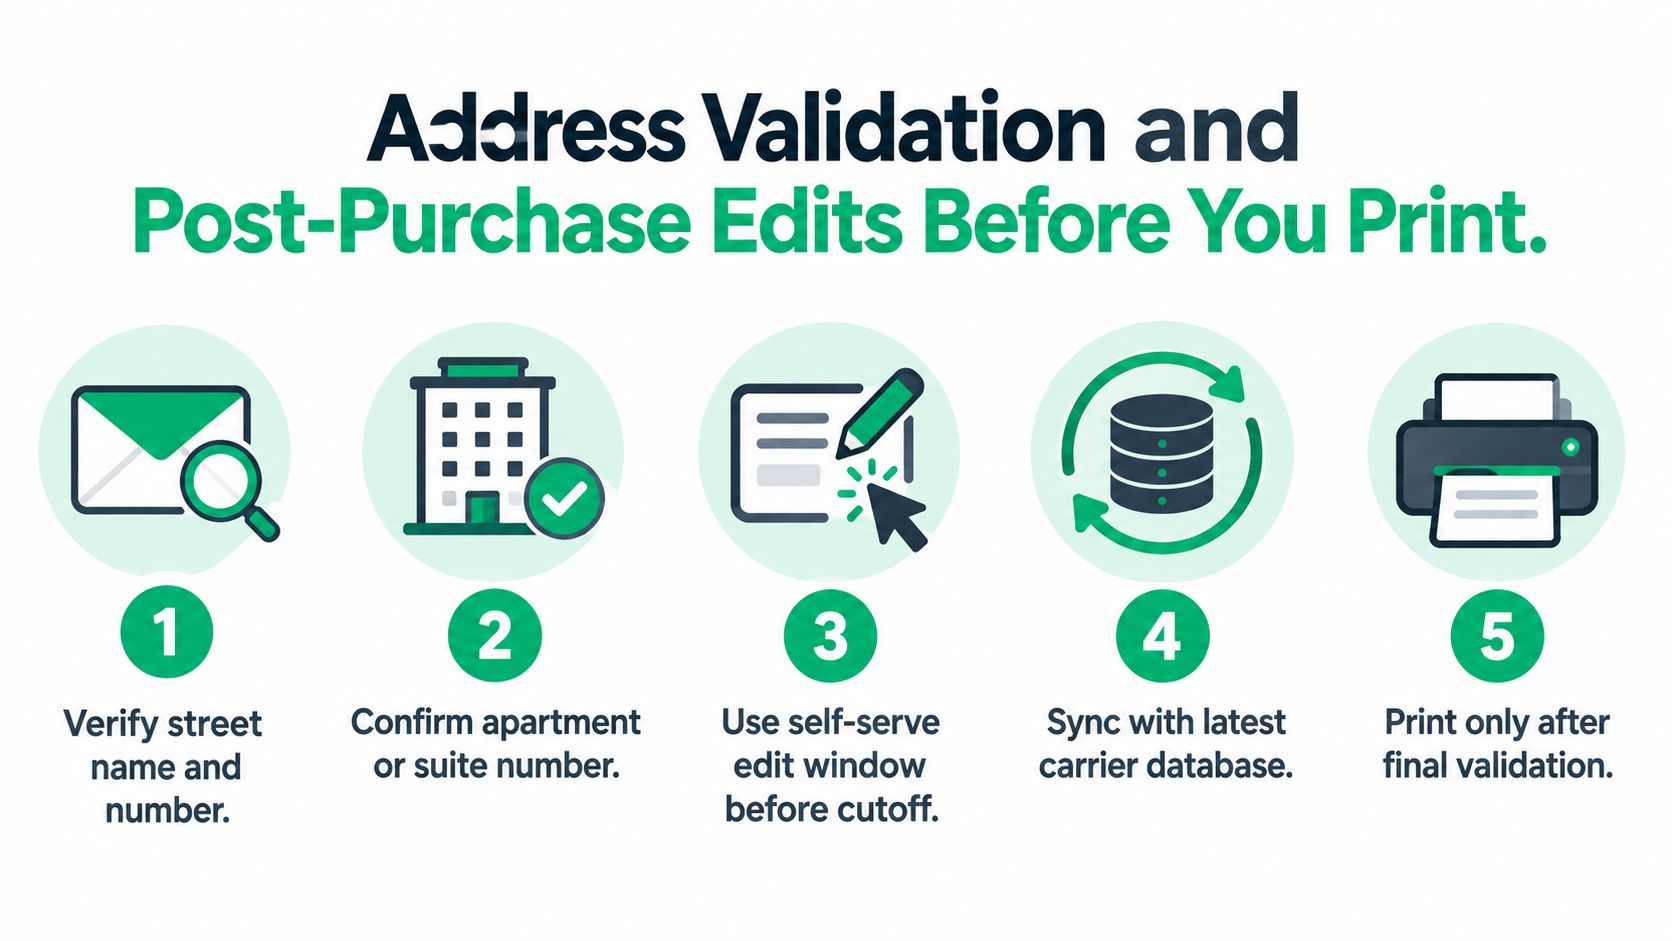
Use a clear edit cutoff
Place an Edit shipping information action on the order confirmation or order-status page. Allow changes to the fields the operation can safely support, then close editing when fulfillment begins. Tell the buyer exactly when the window ends: edits are accepted until the warehouse prints the label, and the destination is frozen afterward.
Keep apartment, suite, unit, and building details in a separate field. A carrier integration or address parser may drop secondary information forced into a free-form street line. For restrictions such as services that do not support PO boxes, show the warning before payment rather than after label creation fails.
Validate the final record
Address verification should happen immediately before purchasing postage. USPS tools can validate and standardize domestic addresses, city and state names, and ZIP Codes against USPS standards. The address verification workflow also covers checks that support label preparation, including product availability and postage calculation. International shipments need a provider that understands the destination country and carrier rules. A domestic database cannot certify every overseas address.
Run validation again after any customer edit, not only when the order is first placed. If the system suggests a correction, show the changed fields to the customer or an agent. Require a decision when the match is uncertain, so an ambiguous suggestion does not become a paid label by accident.
Use this pre-print checklist
- Verify the street: Confirm the street name and number.
- Confirm secondary information: Check the apartment, suite, floor, or unit.
- Keep editing available: Let the buyer correct the order before the fulfillment cutoff.
- Refresh carrier data: Validate against the current address database.
- Print last: Generate the label only after the final destination passes review.
A Shopify store can place these controls closer to the order record with a post-purchase workflow such as Shopify address verification. The application matters less than the sequence: capture the address, allow edits, validate the final record, then print. That order of operations removes common label-issuance errors before they create rework or support volume.
When You Cannot Print at Home
Printing at home isn't the only valid path, and it isn't always the most dependable one. Ink can run out, adhesive stock can curl, and a driver failure can stop an otherwise ready shipment. A resilient operation separates label creation from label printing so one hardware problem doesn't block the order.
USPS Label Broker provides that separation. USPS introduced Label Broker in 2018 and launched it nationwide in 2019, allowing a customer without a printer to receive a prepaid label as a mobile matrix barcode and print it at participating Post Offices or on a printer connected to USPS.com. USPS says the feature is available at postal retail locations nationwide, as described in its Publication 100 overview.
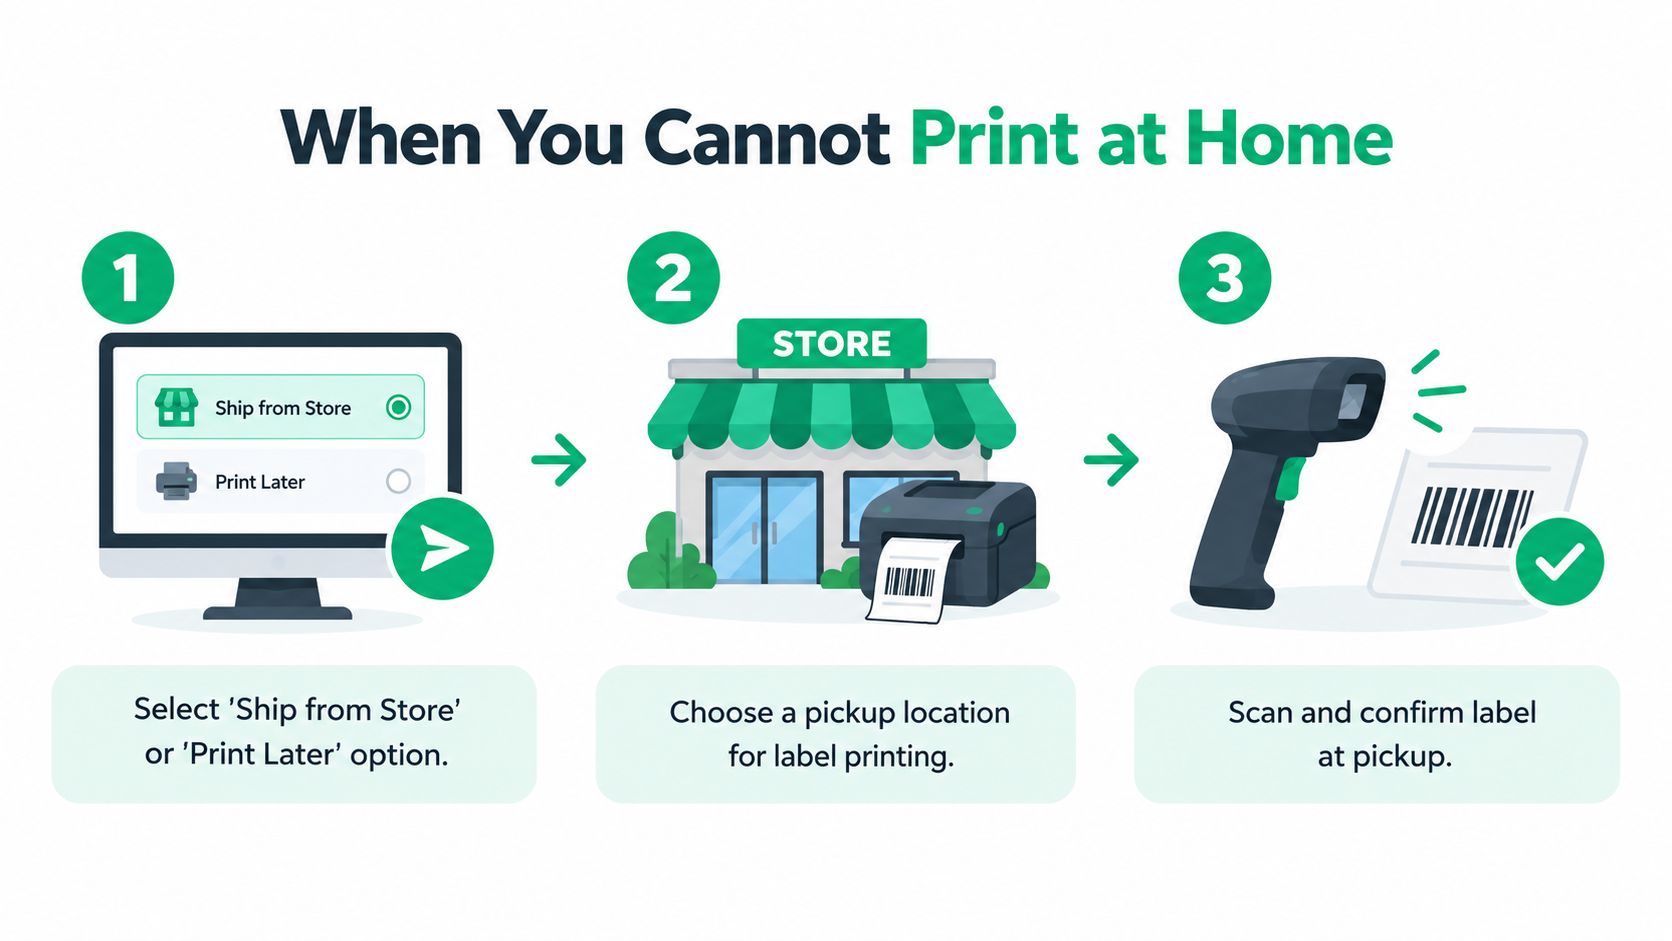
Build more than one fallback
If the order is created digitally, the customer may be able to bring the QR code to a postal location for printing. USPS also describes Label Delivery as an alternative for customers who need a label sent by mail. These options matter for mobile-first shoppers, sellers working away from a printer, and returns where the customer shouldn't need to buy equipment.
Carrier counters can also support assisted workflows, but the exact acceptance process depends on the carrier, account, service, and location. Give the customer the confirmation or label access details on their phone, and make the instructions specific to the selected carrier instead of promising that every counter handles every format.
For warehouse teams, batch generation and pickup manifests reduce dependence on one-at-a-time printing. A saved digital label can wait in the queue while the printer is restored, provided the shipment isn't allowed to miss its operational cutoff.
Put a Print later, Print at location, or assisted-shipping status directly in the order dashboard. Support should see whether a label is paid, waiting for print, ready for pickup, or already scanned. That visibility prevents agents from issuing duplicate labels because the customer couldn't print the first one.
A Repeatable Workflow That Cuts Support Tickets
A quiet support inbox usually starts in fulfillment, not in the help desk. The strongest runbook connects the post-purchase edit window, address validation, label generation, and carrier handoff into one controlled queue.
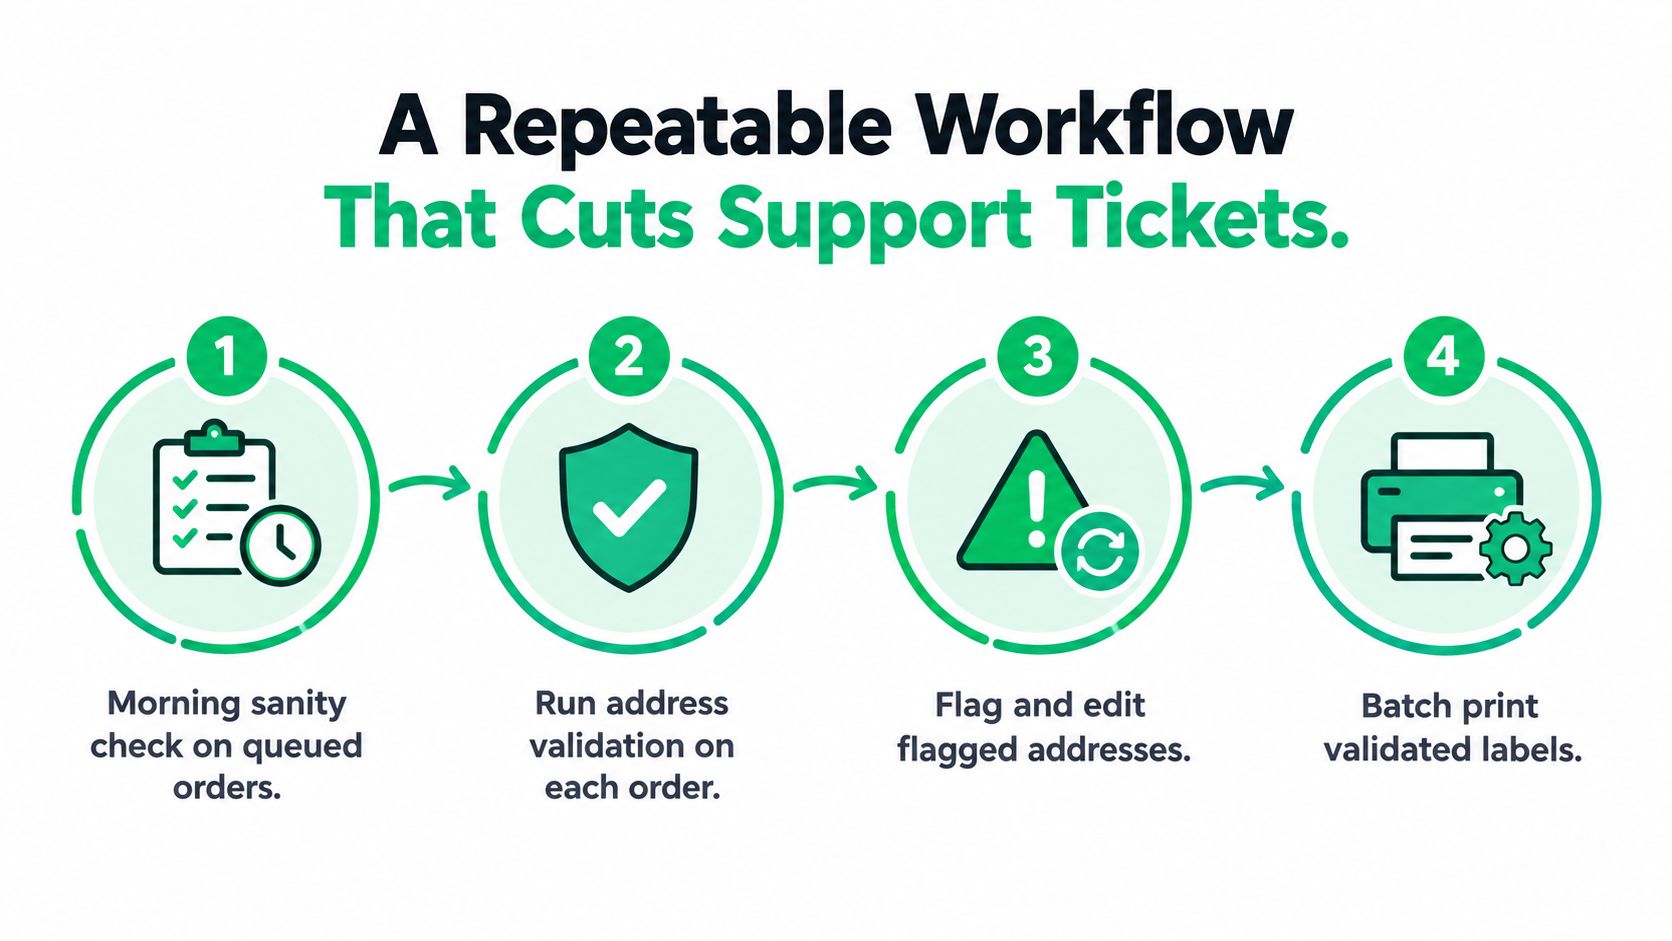
Run the queue in a fixed order
Start the day by reviewing queued orders and checking validation status. Hold any order with a missing apartment or suite, an ambiguous correction, or a destination that needs manual review. Don't let a warehouse batch override a known data problem.
Give customers a defined edit window after purchase, then freeze shipping fields when fulfillment begins. If a change arrives before the cutoff, update the order and regenerate the shipment record. If it arrives after the cutoff, route it to a documented exception process so support doesn't invent a different answer for every customer.
Standardize the final label path through Shopify or the selected shipping application. Generate the correct PDF or ZPL file once, place it in the print queue, and associate the tracking number with the order before the carrier pickup or drop-off.
Operational insight: A documented cutoff is more valuable than an informal promise that staff will “catch” address errors.
Track the process with a small weekly scorecard. Review the address-validation pass rate, the share of orders edited before the cutoff, and the number of label-related tickets per order volume. If those indicators drift, adjust the edit window, validation rules, or exception routing before replacing the entire shipping stack.
For practical guidance on connecting fulfillment controls to support operations, use this resource on reducing support tickets.
SelfServe offers Shopify merchants a post-purchase workflow where shoppers can edit permitted order details within defined windows, while real-time address validation and merchant-controlled cutoffs help keep bad data out of label creation. It also supports customer-managed returns and shipping-label generation within the configured return process.
Add SelfServe to your Shopify workflow if you want customers to correct shipping details before fulfillment locks the order, while your team keeps control over validation, permissions, and timing. Start with the free trial, configure the edit cutoff around your warehouse process, and measure whether fewer address-related tickets reach support.