How to Put Items on Sale on Shopify: 2026 Guide
Your sale starts tomorrow. Email is scheduled, paid traffic is warming up, and the team is asking one basic question that somehow never feels basic in Shopify: what's the cleanest way to mark products down without creating cleanup work later?
That question matters more than the clicks inside the admin.
If you're learning how to put items on sale on Shopify, the actual job isn't just changing a price field. It's choosing a method that matches your catalog, your promotion type, and your ability to undo the whole thing when the sale ends. A one-product flash offer needs a different setup than a collection-wide markdown. A VIP code campaign shouldn't be built the same way as a public clearance event. And if you run a large catalog, the wrong setup can leave you with mismatched variant prices, confusing product pages, and a painful post-sale reset.
Choosing Your Shopify Sale Strategy
Most merchants start with the same assumption: there must be one “sale” setting in Shopify. There isn't. Shopify gives you a few different ways to run promotions, and each one solves a different operational problem.
The first path is direct price markdowns. This is the classic sale presentation where customers see an original price and a lower current price on the product page. It's the right move when you want the discount visible before checkout and when your theme needs to show a clear markdown.
The second path is bulk price editing. Same pricing logic, different workflow. If you're changing a collection, seasonal category, or a large chunk of the catalog, bulk editing keeps your team from touching products one by one.
The third path is discounts. That includes discount codes and automatic discounts. This works better when you want to preserve the regular product price, attach rules to the offer, or tie the campaign to a channel like email, influencer traffic, or cart-based promotions.
Match the method to the sale
A simple way to decide is to start with the customer experience you want:
- Visible markdown on product pages: Use compare-at pricing.
- Checkout incentive without changing displayed product prices: Use a discount code or automatic discount.
- Large promotional event across many SKUs: Use bulk edits, and plan your rollback before launch.
- Short campaign with specific eligibility rules: Use Shopify discounts instead of manual price changes.
Practical rule: If you want shoppers to see the lower price before they add to cart, start with product pricing fields. If the discount only needs to apply at checkout, use a discount.
A lot of margin damage happens when merchants mix methods without a plan. They markdown products, add an automatic discount on top, then realize the storefront message doesn't match the checkout behavior. That's how customers get confused and support tickets start piling up.
Before you launch, decide three things:
- What should the shopper see on the product page
- What should happen in the cart or at checkout
- How will prices return to normal when the sale ends
If you're planning a short campaign, this guide on flash sales and promotions that don't harm your margins is useful because it forces the same discipline most stores skip.
What usually works best
For a first major sale, keep it boring. That's a compliment.
Use compare-at pricing for products that need a visible markdown. Use discounts only when there's a clear reason not to alter displayed prices. Don't build a more complex setup than your team can monitor on launch day.
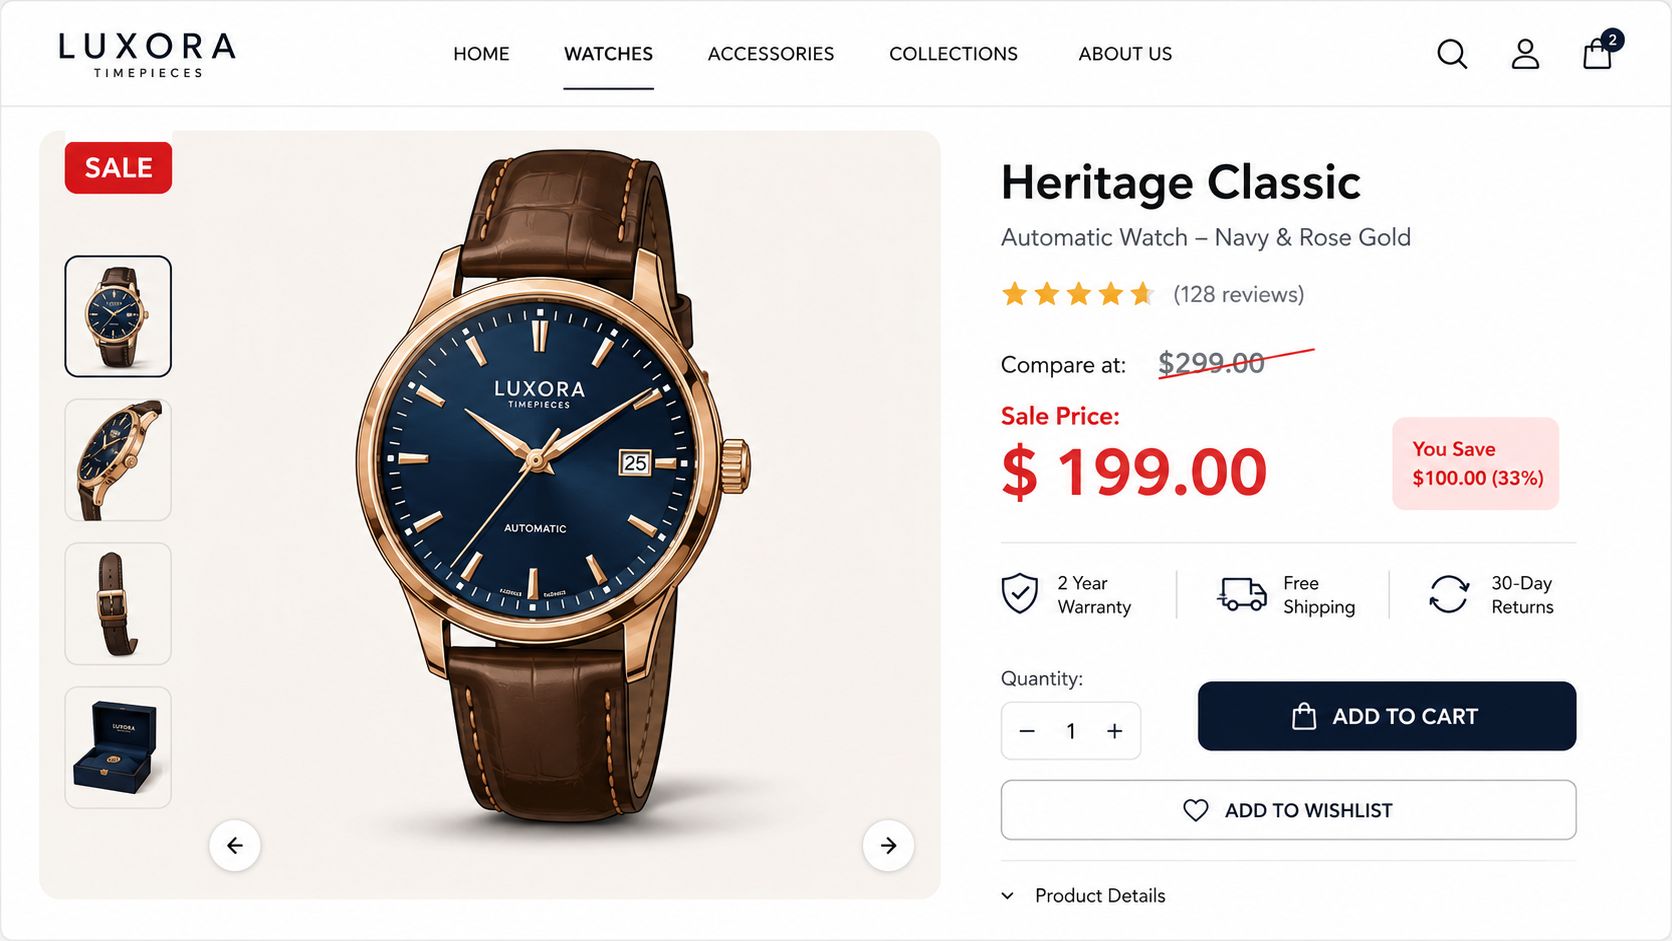
The Foundational Method Using Compare-At Price
A first sale often goes wrong in a very specific way. The merchant changes a price, the theme does not show a clear markdown, and nobody is fully sure which number customers should trust.
Compare-at price is the cleanest starting point because it changes what shoppers see before they reach checkout. Shopify's help documentation on setting sale prices shows the core setup: put the regular price in Compare-at price and the lower selling price in Price. If Compare-at price is higher than Price, Shopify can display the item as discounted on the storefront.
How to set a single product on sale
For one product, the workflow is simple:
- Go to Products
- Open the product you want to discount
- In Pricing, enter the regular price in Compare-at price
- Enter the discounted selling price in Price
- Save the product
If the item normally sells for 50 and you want to sell it for 35, set Compare-at price = 50 and Price = 35.
That same logic applies to variants. The operational question is whether every variant should be discounted. If only some are on sale, check how your theme handles mixed pricing on collection pages and product cards before you publish. Some themes surface the lowest variant price in ways that can make the offer look broader than it is.
Why this method is the foundation
Use compare-at pricing when the sale itself is part of the merchandising.
It gives shoppers immediate price context on the product page, collection page, and often search results, depending on the theme. That makes it a better fit than a checkout discount when your goal is to advertise a visible markdown, run a category sale, or improve click-through from merchandising blocks.
It is also easier to explain internally. Your team can look at the product record and see the regular price and sale price without tracing discount rules in another part of Shopify.
Where merchants get into trouble
The mechanics are easy. Cleanup is what causes problems.
A few mistakes show up repeatedly:
- The fields are reversed: The higher number belongs in Compare-at price and the lower number belongs in Price.
- Only one variant gets updated: This creates inconsistent sale messaging across sizes, colors, and product cards.
- The theme badge is treated as proof the setup is correct: A “Sale” badge does not guarantee the product page, collection page, and checkout all reflect the same pricing logic.
- There is no reversion plan: After the campaign, merchants forget which products changed and leave stale compare-at prices live.
That last point matters more than it sounds. Compare-at pricing is excellent for a visible markdown, but it is still a manual price change unless you pair it with a process or app that restores prices later. For a first major sale, keep a record of the original values before you touch anything.
For merchants focused on conversion after the click, Shopify product page optimization matters here too. A sale performs better when the pricing display, variant selection, and product messaging are easy to understand in a few seconds.
Scaling Your Sales with Bulk Edits and CSVs
A 20-product sale can be handled in the admin. A 200-product sale needs a process.
That is the point where pricing work stops being a simple merchandising task and starts becoming an operational one. The method you choose affects speed, error rate, and how painful cleanup will be after the promotion ends. For most first-time Shopify sale campaigns, the right sequence is simple: use the bulk editor for controlled updates, then use CSV only if the catalog size, review process, or rollback requirements demand it.

Use the bulk editor for controlled changes
Shopify's bulk editor is the best fit when you want more control than manual product edits, without taking on the risk of a full CSV import. You can filter the products involved in the campaign, open the bulk editor, add the Price and Compare-at price columns, and update many rows in one pass.
For a lot of merchants, this is the practical middle ground. The interface is visible enough for a merchandiser or founder to review line by line, but still fast enough to handle a meaningful collection sale.
Use the bulk editor when:
- The sale applies to a defined group of products: collections, seasonal products, or a vendor subset
- You need human review before saving: pricing mistakes are easier to spot in a grid than across individual product pages
- Variants matter: sizes, colors, and other variants can be checked in the same workflow
- The team is small: one person can make the edits and another can audit them before launch
The same pricing logic still applies. Put the original higher price in Compare-at price and the active lower sale price in Price. If a product normally sells for 50 and the sale price is 35, Compare-at price should be 50 and Price should be 35.
After you understand the layout, this walkthrough is helpful for seeing the process in motion:
When CSV becomes the better tool
CSV is the better option when the sale touches a large share of the catalog, when several people need to review pricing before launch, or when you already know you will need a clean rollback file at the end of the campaign.
It is also the method I recommend when the sale includes edge cases. Products with many variants, inconsistent legacy pricing, or overlapping merchandising rules are much easier to audit in a spreadsheet than in a live admin view.
The trade-off is simple. CSV gives you scale and documentation, but it also gives you more ways to create a mess. A wrong sort, a stray paste, or an unnecessary overwrite can change fields you never meant to touch.
Treat CSV work like change management:
- Export the product data before editing anything
- Limit edits to the pricing columns involved in the sale
- Keep a clearly labeled original file and a sale version
- Document which products or variants were intentionally changed
- Import a small test set first if the campaign is high stakes
Large sale events usually fail because of execution errors, not because the discount strategy was wrong.
A practical workflow for large catalogs
The cleanest sale operations usually follow this order:
| Step | What to do | Why it matters |
|---|---|---|
| Export first | Keep a clean pre-sale file | Gives you a fast rollback option |
| Edit pricing fields only | Avoid changing unrelated columns | Lowers the risk of import errors |
| Audit variants | Review sizes, colors, bundles, and duplicate SKUs | Prevents mixed pricing across the storefront |
| Test a sample | Check several products live before the full push | Catches display or theme issues early |
| Save a rollback file | Prepare the post-sale reversion version in advance | Makes cleanup much faster |
Merchants often focus on launch and leave reversion for later. That is where sale pricing lingers longer than intended, compare-at values stay live after the campaign, and reporting gets muddy.
Build the return-to-normal file before the sale starts. That one step saves more time than any shortcut during setup.
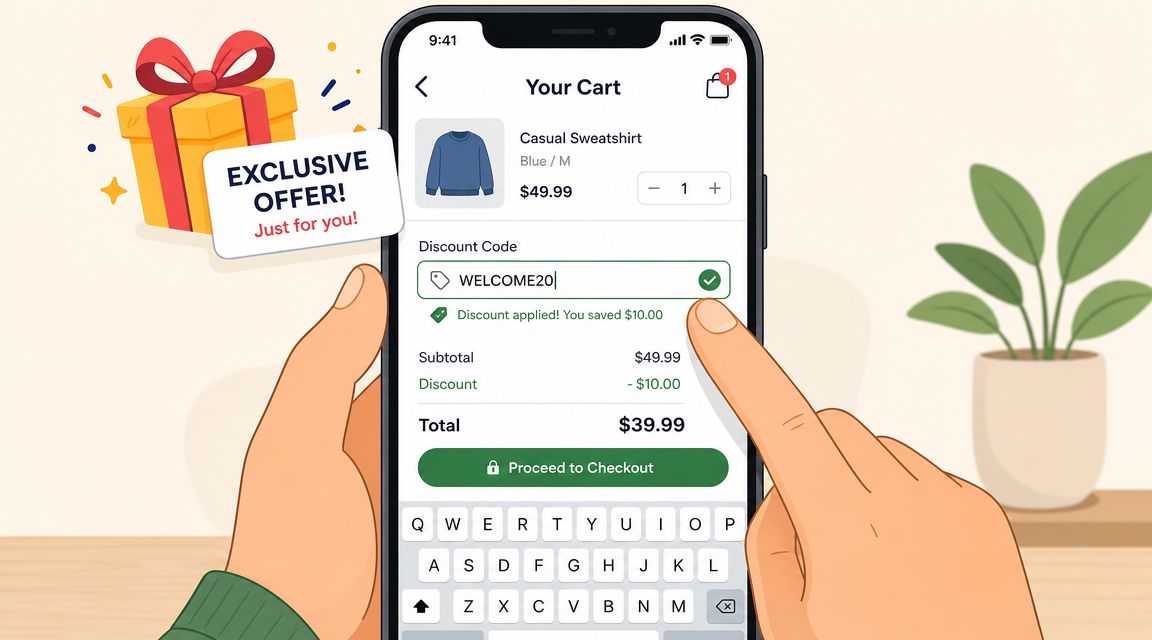
Using Discount Codes and Automatic Discounts
Not every sale should change the product's displayed price. Sometimes the smarter move is to leave catalog pricing alone and apply the promotion at checkout.
That's where Shopify discounts fit. Merchant guidance summarized in the verified data notes that Shopify discounts can be created as percentage-based, fixed-amount, free shipping, or buy X get Y offers, and that automatic discounts can apply at checkout without the customer entering a code, as described in this overview of running a sale on Shopify.
Compare-at pricing versus discounts
These methods solve different jobs.
| Method | Best use case | Main trade-off |
|---|---|---|
| Compare-at pricing | Public markdown visible on product pages | Requires price changes and later cleanup |
| Discount code | Channel-specific or exclusive offers | Adds friction because customers must enter a code |
| Automatic discount | Seamless checkout promotion | Storefront may not show the markdown clearly without theme support |
If you're asking how to put items on sale on Shopify for a broad sitewide campaign, compare-at pricing often creates the clearest customer experience. If you're running an email-only offer, influencer code, or conditional cart promotion, discount codes are usually cleaner.
Automatic discounts sit in the middle. They remove code-entry friction, which is useful, but they also create a merchandising challenge. In community discussions, merchants note that when a sale is driven by automatic discounts rather than compare-at pricing, showing the discounted price on collection or product pages may require theme edits or third-party apps. That's the part many “how to” articles skip.
When each discount type makes sense
- Percentage discount: Good for category-wide offers where the rule is easy to understand.
- Fixed amount discount: Better when you want a stable dollar-off style offer across a narrower product set.
- Free shipping: Useful when shipping cost is the main objection.
- Buy X get Y: Better for moving related inventory or increasing basket size.
If the discount is part of the message, show it before checkout. If the discount is part of the incentive, applying it at checkout can work fine.
The operational question merchants miss
Discounts are easier to turn on and off than mass price edits. But they don't always create the same storefront presentation. That means the right choice depends on whether your sale is primarily a merchandising event or a checkout incentive.
If your ads and landing pages promise visible markdown pricing, use pricing fields. If your campaign is “VIP members get an extra offer at checkout,” a discount is usually the cleaner tool.
Advanced Sale Strategies and Automation
Manual sale setup works until timing becomes the problem.
A lot of merchants can handle the launch. The trouble starts at the end of the promotion, especially when someone has to revert prices late at night, audit variants, and make sure the storefront no longer shows outdated markdowns. Shopify community discussions highlight that merchants want future start and end dates for sale pricing, but Shopify's native sale-pricing flow is manual and doesn't include a built-in process for automatically reverting prices after the promotion ends, as discussed in this thread about sale scheduling and compare-at pricing limitations.
The scheduling gap
This is the biggest operational trade-off in Shopify sales management.
Compare-at pricing is strong for storefront presentation, but it's weak for timed campaigns unless your team is prepared to manage every change manually. That's why many merchants either:
- use manual updates and accept the labor,
- switch to discounting tools for easier timing,
- or layer in apps and automation to control the workflow.
Each option has trade-offs. Manual updates preserve the exact storefront pricing display you want, but they create rollback risk. Discount tools are easier to activate and deactivate, but can create inconsistencies between merchandising and checkout. Apps can reduce the workload, but only if the team defines a clear source of truth for pricing.
Theme display and automation need to work together
A sale doesn't feel organized unless the storefront supports it visually. That usually means checking whether your theme handles:
- Sale badges on collection pages
- Crossed-out pricing on product cards
- Consistent variant pricing display
- Promotional banners that match the active offer
If the store uses automated discounts instead of compare-at pricing, the theme may not show those discounts the way you expect. That's when teams often end up with a checkout discount and a storefront that still looks full price.
For merchants using more advanced workflows, Shopify Flow is worth understanding for automation around tagging, internal process triggers, and operational handoffs. It won't replace core sale pricing logic by itself, but it can support cleaner campaign management.
A practical automation mindset
Don't chase full automation unless the process is already stable manually.
A reliable setup usually looks like this:
- Decide whether the sale lives in pricing fields or discount rules
- Prepare the rollback plan before launch
- Test the storefront display on product pages, collection pages, cart, and checkout
- Assign one owner for activation and one owner for post-sale verification
If your store also uses post-purchase workflows, tools like SelfServe can fit into the operational side after checkout because the app lets customers manage certain order changes and supports post-purchase upsell modules. That doesn't replace sale setup, but it can help stores manage the customer experience after a promotion drives a surge in orders.
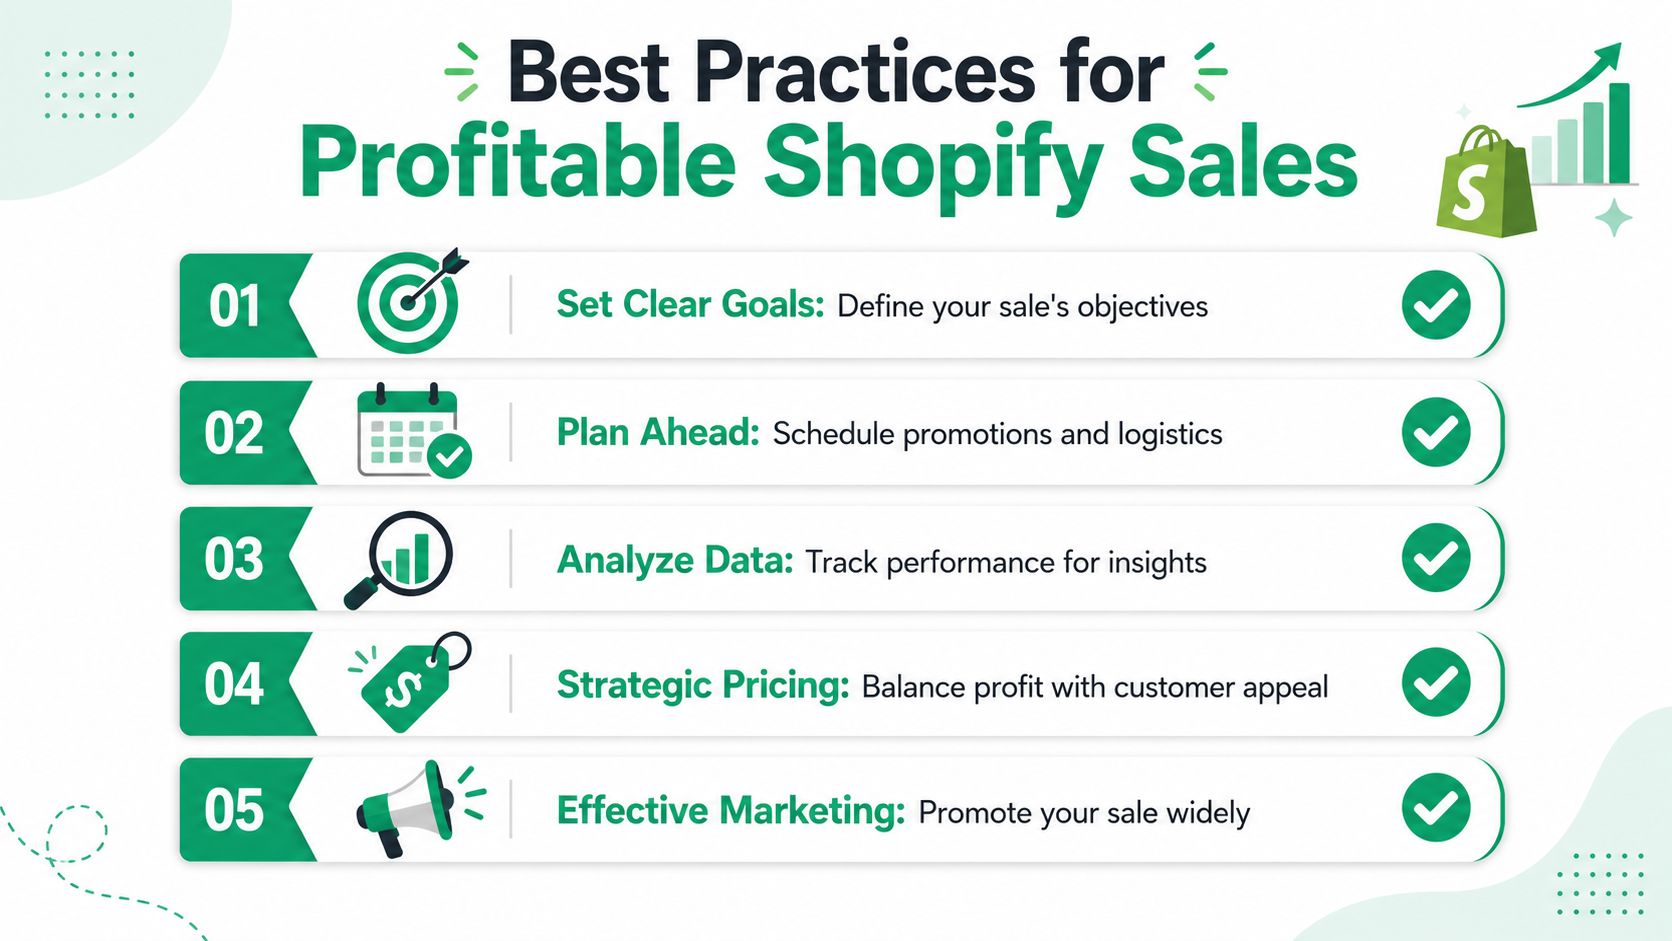
Best Practices for Profitable Shopify Sales
The stores that run clean sales don't improvise much. They choose one pricing method per campaign, test it, and plan the reset before the first email goes out.
That discipline matters because sales create pressure across pricing, merchandising, support, and fulfillment at the same time. A sloppy promotion can still generate orders, but it often leaves margin leaks and operational mess behind it. A planned sale gives you a better shot at strong revenue without the cleanup headache.
The checklist that prevents most sale mistakes
Keep this framework simple:
- Set a clear objective: Are you trying to clear aging inventory, increase order volume, or create a seasonal revenue spike? The method should follow the goal.
- Choose one primary discount mechanism: Public markdowns belong in compare-at pricing. Exclusive and channel-specific offers usually belong in discount codes or automatic discounts.
- Prepare the end before the start: Price reversion, banner removal, and variant checks should already be assigned before launch day.
- Promote the sale everywhere customers look: Homepage, collection pages, email, SMS, paid traffic, and social should all reflect the same message.
- Review performance after the campaign: The useful metrics named in merchant guidance include conversion rate, average order value, and total sales. Use those to judge whether the promotion worked operationally and commercially, not just whether traffic spiked.
A sale is only successful if the storefront message, checkout behavior, and post-sale operations all agree with each other.
Think beyond Shopify if you sell on multiple channels
If your team also sells on marketplaces, keep your promotional logic aligned across channels. A Shopify sale paired with weak marketplace merchandising creates inconsistent brand presentation. If Amazon is part of your mix, resources on how to fix my Amazon listings can help tighten product presentation so your discount strategy doesn't outpace your catalog quality elsewhere.
What I'd recommend for a first major sale
For most first-time campaign launches, the safest structure is this:
| Sale type | Recommended method | Reason |
|---|---|---|
| One or a few featured products | Compare-at pricing | Clear markdown visibility |
| Collection-wide event | Bulk editor or CSV workflow | Better control at scale |
| VIP or partner offer | Discount code | Easy campaign attribution |
| Cart-based promotion | Automatic discount | Lower friction at checkout |
If you keep asking how to put items on sale on Shopify, the answer is simpler than it looks. Use compare-at price when the sale needs to be seen. Use discounts when the offer needs rules. Use bulk workflows when the catalog is too large for manual edits. And always build the cleanup plan before the launch plan.
If your sale drives a surge in orders, post-purchase operations can get messy fast. SelfServe helps Shopify merchants reduce support workload by letting customers manage approved order changes after checkout, and it also supports post-purchase upsell offers on Thank You and Order Status pages. That's useful when a successful promotion increases both order volume and the number of customer service requests that follow.