Guide: modify shopify checkout page to boost conversions
So, can you actually modify your Shopify checkout page? The short answer is yes, but how you can do it is tied directly to your Shopify plan.
For most store owners, customizations stick to the surface level—things like swapping out your logo and adjusting color schemes to match your brand. But for merchants on Shopify Plus, a whole new world of advanced tools opens up, primarily through what Shopify calls Checkout Extensibility.
The New Rules for Customizing Your Shopify Checkout
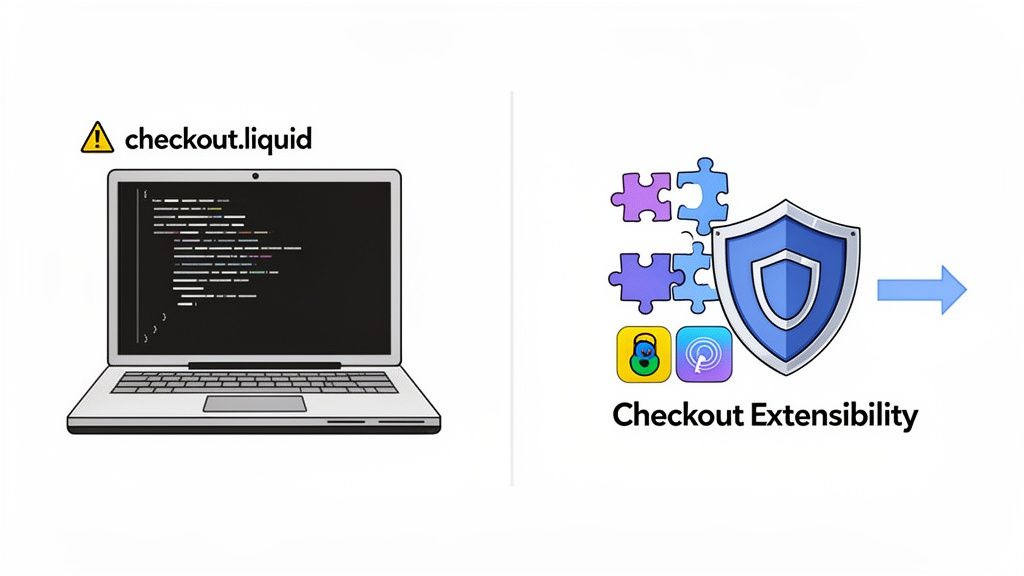
If you’ve been on Shopify for a while, you probably remember the days of editing the checkout.liquid file. That era is officially over. Shopify has moved to a more robust, secure, and stable framework called Checkout Extensibility.
This wasn't just a random change. It’s a strategic move to safeguard the checkout experience for everyone. With so many moving parts, like accelerated payment options and constant platform updates, custom code could easily break the entire process. This new approach prevents those old headaches and ensures every checkout stays fast and reliable.
Getting a handle on this new reality is the first step to making smart, effective changes to the final, crucial steps of your customer’s journey.
What Are Your Real Options?
The path you can take to tweak your checkout comes down to your subscription plan. It’s the single biggest factor. This flowchart breaks down the main avenues available.
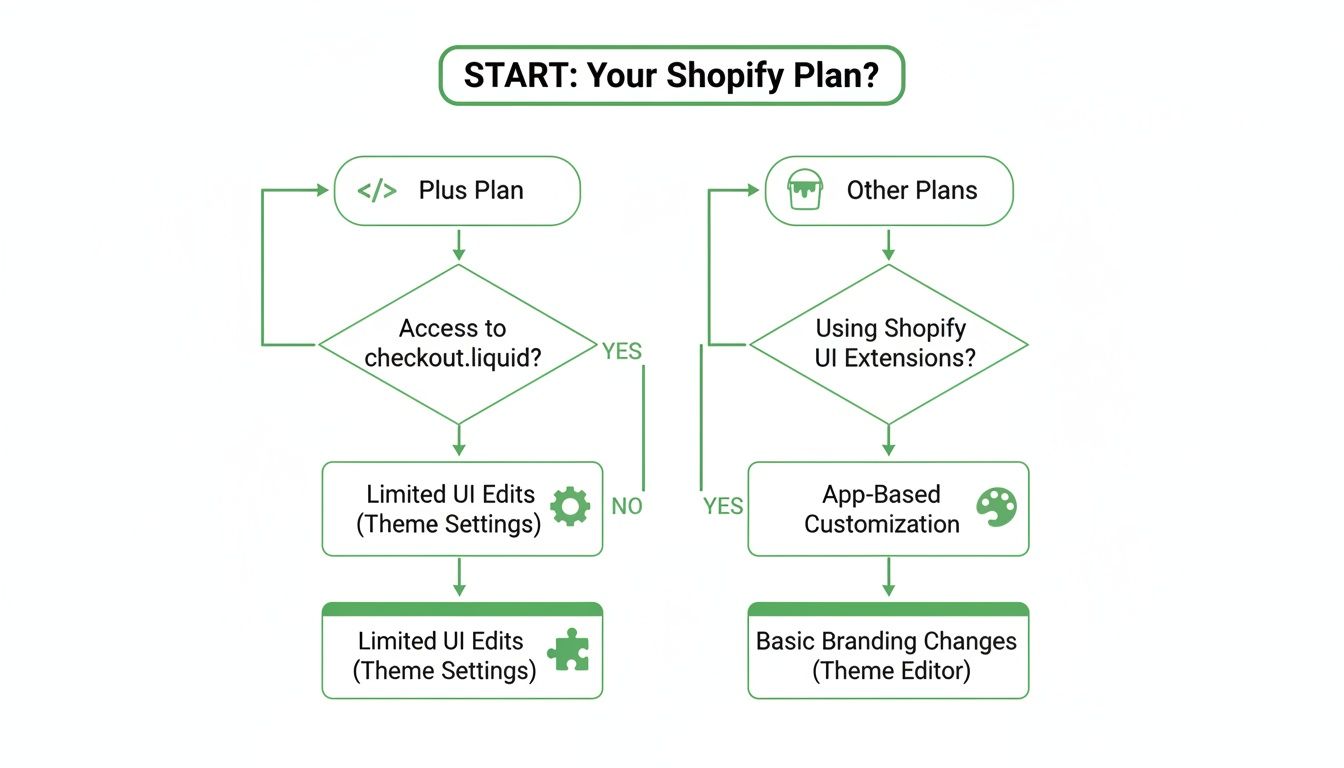
As you can see, Shopify Plus is the key to unlocking code-level changes through extensions. For everyone else, the focus remains on branding and adding functionality after the purchase is complete.
This shift aligns with a huge e-commerce trend: simplification. Shopify’s move to a one-page checkout as the default in 2026 is already showing big results, with some stores seeing an average conversion lift of 7.5% over older, multi-page setups. It’s all about removing friction that leads to abandoned carts.
The core takeaway is this: Instead of thinking about "editing" the checkout, the modern approach is about "extending" it. You're adding features into predefined, safe areas rather than altering the core structure.
This ensures your checkout remains fast, secure, and ready for whatever Shopify rolls out next. With this in mind, you can set realistic goals and build a clear plan for improving your store. For more on navigating these platform changes, you can dig into what Shopify’s latest updates mean for your store.
Shopify Checkout Modification Methods At a Glance
To make it even clearer, here’s a quick comparison of the main ways you can approach checkout customizations on Shopify. This table should help you quickly pinpoint the right strategy based on your plan and what you’re trying to achieve.
This breakdown shows a clear divide: Shopify Plus is for deep, integrated changes within the checkout flow itself, while other plans excel at branding and post-transaction enhancements. Choosing the right method from the start will save you a lot of time and frustration.
Mastering Checkout Extensibility on Shopify Plus
If you're on Shopify Plus, Checkout Extensibility is your new best friend. It’s a total reimagining of how we customize the checkout experience, moving us away from the old, fragile days of editing the checkout.liquid file directly. This new model is all about security and stability, using UI extensions to add powerful features into specific, pre-approved spots in the checkout flow.
Think of it this way: instead of having to carve your checkout from a single block of stone, Shopify now gives you a set of high-quality LEGO bricks. You get designated connection points, and you (or your developer) create custom blocks to snap right in. This structured approach guarantees your customizations won't break with the next platform update and play nicely with crucial tools like Shop Pay.
Unlocking Practical Checkout Enhancements
So what can you actually build with this? The real power lies in adding functionality that smooths out the buying process and builds customer trust right when it matters most.
Let’s move past theory and look at some real-world applications I’ve seen make a big difference:
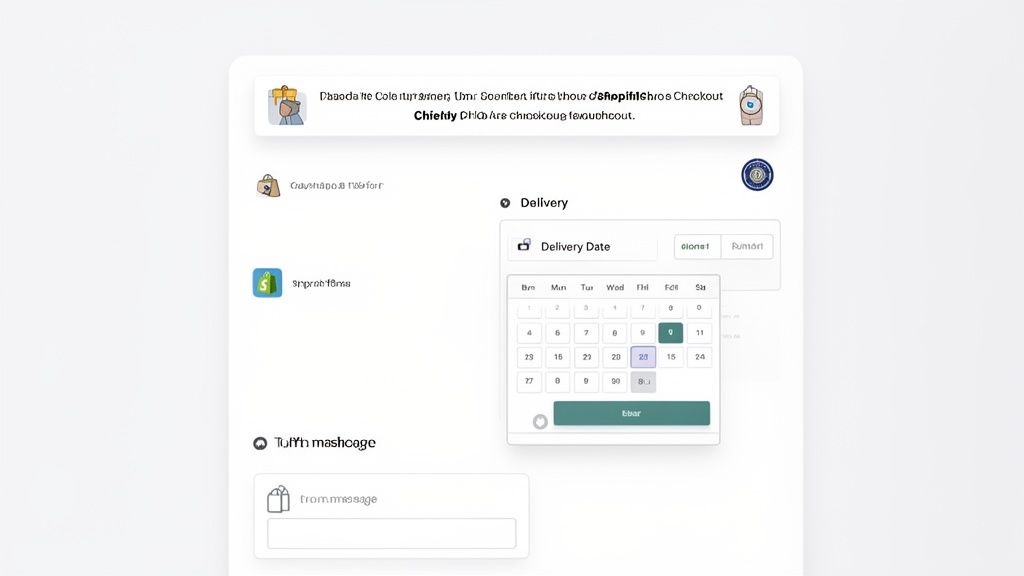
- Implement a Delivery Date Picker: This is a must-have for anyone selling gifts, flowers, or anything time-sensitive. Giving customers control over their delivery date is a massive conversion booster.
- Add a Gift Message Field: A simple text box to let customers add a personal note. It's a small touch that dramatically improves the gifting experience.
- Display a Custom Promotional Banner: You can drop a banner right on the checkout page to remind shoppers of a last-minute deal. Something like, "Just one more item to go for free express shipping!" can really push up your average order value.
- Collect Additional Order Information: Need a P.O. number for B2B sales or special handling instructions? Add a custom field to capture it cleanly without cluttering the product page.
These aren't just cosmetic changes; they solve real customer problems and directly impact your bottom line. Especially for high-volume Shopify Plus stores, features like these are non-negotiable for crafting a sophisticated user journey. And with 43% of customers now opting for accelerated checkouts like Shop Pay—which can lift conversions by a staggering 50% over guest checkouts—failing to adapt means leaving money on the table. For a closer look at the data, you can explore the full research on checkout customization.
How Checkout UI Extensions Work
Under the hood, Checkout Extensibility is powered by Checkout UI extensions. These are essentially small, self-contained apps built with Shopify's tools. They render custom content at specific locations, which Shopify calls extension points.
This is a huge departure from the old checkout.liquid approach, where you had one giant, unwieldy file. The new method is far more modular and precise.
Key Takeaway: You’re no longer editing one massive template. Instead, you build or install small apps that inject content and logic into specific, Shopify-approved locations on the checkout page.
For example, if you wanted to add that promotional banner we talked about, you would target an extension point like purchase.checkout.block.render. This tells Shopify exactly where to place your banner within the page's structure, ensuring it looks and works perfectly.
Combining UI Extensions with Shopify Functions
This is where things get really powerful. When you pair your visual UI extensions with Shopify Functions, you can create some truly dynamic experiences. Think of it like this: the UI extension is the face of the feature, and the Shopify Function is the brain behind it.
Let's say you want to offer a free gift on orders over $150. Here’s how the two pieces would work in tandem:
- Shopify Function: You'd write a function that runs on Shopify’s own servers. Its job is to check the cart total during the checkout process.
- Logic Execution: If the cart total cracks the $150 mark, the function automatically adds the free gift product to the order.
- UI Extension: A matching UI extension then displays a message to the customer, like "Congratulations! We've added a free gift to your order."
This separation of concerns—keeping the front-end visuals separate from the back-end logic—is what makes the whole system so incredibly robust. It means your complex custom rules won't ever slow down or break the checkout experience for your customers. Your customizations are faster, more secure, and completely future-proof. This is the only approved way to modify your Shopify checkout page and the path forward for all Plus merchants.
The Old Guard: Working with the Legacy checkout.liquid
Even though Checkout Extensibility is the way forward, a lot of established Shopify Plus stores are still running on the old checkout.liquid file. If that's you, you know the drill: you’re maintaining a powerful but aging system, and you need to understand its quirks while planning your next move.
For years, the checkout.liquid file was the only game in town for Plus merchants who wanted to seriously modify the Shopify checkout page. It gave you almost total control over the HTML, CSS, and JavaScript. This was how brands built truly unique checkout experiences that were simply out of reach for stores on lower-tier plans.
What Was Possible with checkout.liquid?
For stores that haven’t made the jump to Extensibility yet, this one file is still doing a lot of heavy lifting. To get to it, you head into your theme’s code editor and find checkout.liquid tucked away in the "Layout" directory.
With direct access to this file, we could pull off all sorts of customizations. Here are a few classic examples you've probably seen or implemented:
- Trust Badges: We’d drop in images for secure payments or satisfaction guarantees right under the payment section. It was a quick win for reducing last-minute cart abandonment.
- Custom Analytics Scripts: Need to fire a specific marketing pixel or a custom Google Analytics event that Shopify didn't support?
checkout.liquidwas the place to do it. - Unique CSS Styling: We could override Shopify's default styles to reshape buttons, add custom brand fonts, or tweak the layout to match the main website perfectly.
- Custom Form Fields: This was a big one. You could inject your own HTML and JavaScript to collect extra info, like a delivery date selector or a field for special instructions.
These tweaks allowed brands to build a highly tailored final step in the customer journey. But all that power came with some serious baggage and risk, which is exactly why Shopify built a new, more stable framework.
The Risks and the Countdown to Deprecation
The biggest problem with editing checkout.liquid directly is how fragile it is. Your custom code isn't sandboxed; it’s sitting right in the middle of a core Shopify file. When Shopify pushed an update to the checkout, it could easily clash with your changes and break something critical—like a payment gateway—with zero warning.
Key Takeaway: Make no mistake,
checkout.liquidis on its way out. Shopify is pushing all Plus merchants to migrate to Checkout Extensibility, and this isn't just a friendly suggestion. It's a mandatory move to keep your checkout secure, stable, and compatible with all future platform features.
Sticking with checkout.liquid means you'll eventually be cut off from new features, including critical updates to Shop Pay. The risk of waking up to a broken checkout, the most important part of your sales funnel, is just too high to ignore.
A Smart Plan for Maintenance and Migration
If you're still using checkout.liquid, you need a two-pronged strategy: keep the lights on for now, but plan your escape. My advice? Stop adding any new, complex features to this file. Focus on keeping what you have stable and start auditing your existing customizations.
Go through your checkout.liquid file and document every single modification.
- What is it? Identify the code and its function (e.g., adds a trust seal banner).
- Why is it there? Determine its business purpose (e.g., to increase customer trust).
- What's the new way? Find its modern equivalent, whether it's a Checkout UI extension or an app.
This audit will become your migration roadmap. You’ll find that many common checkout.liquid hacks now have safer, officially supported solutions. By planning this transition now, you’ll avoid the inevitable panic when the final deprecation date is announced and ensure you can modify your Shopify checkout page the right way—safely and seamlessly.
Enhancing the Post-Purchase Experience on Any Shopify Plan
So far, we’ve spent a lot of time on the heavy-duty customizations available to Shopify Plus merchants. But what if you're not on Plus? Are you stuck with a generic, unchangeable checkout experience?
Not at all. The strategy just shifts. Instead of focusing on what happens during the transaction, you pivot to the crucial moments immediately after.
For the vast majority of Shopify stores, the real untapped potential is hiding in plain sight on the Thank You and Order Status pages. This is some of the most valuable digital real estate you own. A customer has just put their trust in you and completed a purchase; their focus and buying intent are at an all-time high. This is your chance to make a lasting impression.
Think beyond a simple receipt. You can transform this page into a dynamic hub where customers can solve their own problems, discover complementary products, and walk away feeling even more confident about their purchase. This isn't just about providing good service—it's a smart way to cut down on support costs and boost your revenue.
The Power of Post-Purchase Customization
Let’s walk through a classic scenario. A customer, thrilled with their new purchase, rushes through checkout and hits "confirm," only to realize they typed their apartment number wrong. The old way? A frantic search for your contact form, a new support ticket, and a time-consuming email exchange for your team to sort out.
There’s a much better way. With the right setup, that same customer can fix the typo in their shipping address directly on the order status page, no help needed. Just like that, you've dodged a costly fulfillment error, saved your support team from another ticket, and empowered your customer with a quick, painless solution.
That’s the essence of post-purchase modification. It’s about giving customers self-service tools to handle the most common issues that pop up right after a sale.
Here are a few of the most impactful features you can add:
- Editable Shipping Addresses: Let customers correct typos or update their address within a time window that you control.
- Contact Information Updates: Allow shoppers to fix a misspelled email or add their phone number to get tracking updates.
- Last-Minute Upsells: Present a one-click offer to add a related product to the order they just placed.
- Order Cancellation Requests: Give customers a simple way to request a cancellation, which you can then review and approve.
These aren't just small tweaks. They represent a fundamental shift in how you manage the customer journey, turning a static confirmation page into a powerful customer service and revenue-driving asset.
Bringing Self-Service to Your Order Status Page
For stores on any Shopify plan, apps are the key to unlocking this kind of functionality. Solutions like SelfServe are built specifically to add these self-service features to your Thank You and Order Status pages, integrating smoothly without you having to touch a line of code.
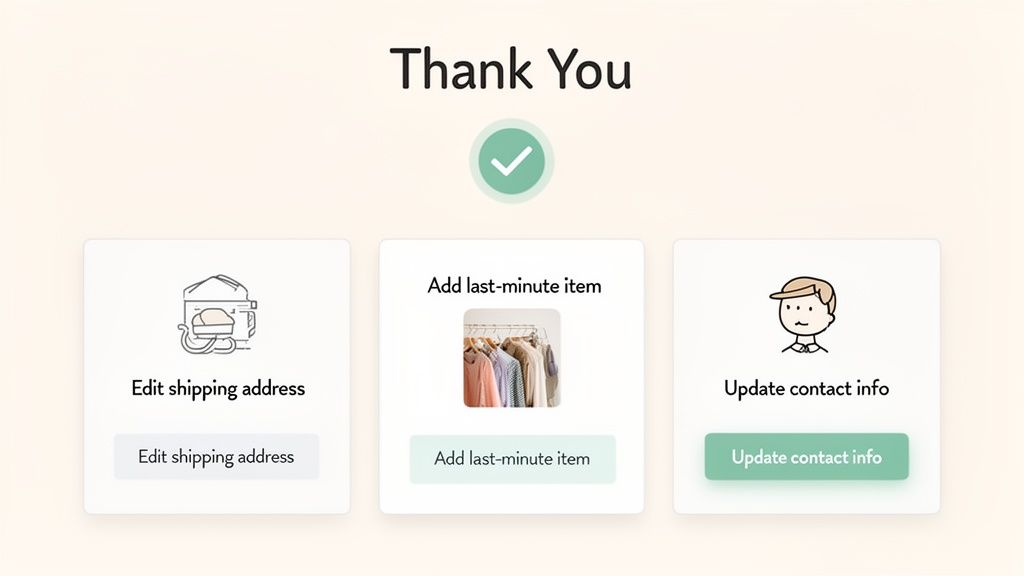
This is what it looks like in action. A tool like SelfServe can embed these order management options right where they make the most sense.
Notice how clear and intuitive this is for the customer. The options to edit shipping details or cancel the order are right there, exactly where they'd look for them. This proactive approach turns what could have been a support headache into a simple, one-click fix for the shopper.
The benefits ripple across the business. SelfServe, for instance, helps merchants prevent the 40% surge in "where is my order?" tickets that often stem from simple address errors. Even better, high-volume stores using apps like SelfServe are seeing a 12% upsell uptake on their order status pages. This directly taps into that post-purchase momentum, lifting average order value by as much as 20% using native Shopify Functions.
Capitalizing on Peak Buyer Intent with Upsells
The moment after a customer clicks "Buy Now" is a golden opportunity to increase your average order value (AOV). They’ve already committed, their trust is high, and their wallet is out. A well-placed post-purchase upsell feels less like a pushy sales tactic and more like a genuinely helpful recommendation.
Unlike pre-purchase upsells, which can sometimes distract from the main goal of getting the sale, post-purchase offers are completely risk-free. The original transaction is already locked in.
By placing upsell offers on the Thank You page, you capture additional revenue without ever jeopardizing the core conversion. It's a win-win: the customer discovers a relevant product, and you increase the value of the sale.
Imagine someone just bought a new camera from your store. On the order confirmation page, you could offer them a discounted memory card or a protective case. The relevance is immediate, and the friction to add it to their order is practically zero.
To explore this further, check out our guide on how to create a successful Shopify post-purchase upsell strategy. This approach turns a transactional endpoint into an ongoing conversation, building both revenue and customer loyalty.
Best Practices for a Checkout That Actually Converts
Making technical changes to your Shopify checkout is one thing, but making the right changes is what separates a successful store from a struggling one. You can modify your Shopify checkout page all you want, but if your strategy isn't grounded in a solid customer experience, you could actually hurt your conversion rates.
Before you touch a line of code or install a new extension, let's walk through the core principles that should guide every decision you make.
The journey from a product page to that final "thank you" needs to feel seamless. This means your branding can't just disappear when the customer hits "checkout." It shouldn't suddenly feel like they've been handed off to a generic, third-party processor.
Stick with the same fonts, color scheme, and logo you use across your entire site. This kind of consistency is crucial for building trust right when the customer is about to hand over their payment info. Any abrupt design change can feel jarring, making shoppers second-guess the security of the page and ultimately abandon their cart.
Prioritize Mobile Responsiveness Above All
These days, a mobile-first approach isn't just a good idea—it's everything. With over 70% of ecommerce traffic coming from mobile devices, it's a safe bet that most of your customers are navigating your checkout on a small screen.
Every single custom element you add, from a simple gift message field to a complex date picker, has to be tested relentlessly on different phones and tablets.
Here are the absolute must-haves for your mobile checkout:
- Large, Tappable Buttons: Make sure every CTA is easy to hit with a thumb without accidentally tapping something else.
- Readable Font Sizes: Nobody wants to pinch and zoom just to read what they're buying.
- Smart Form Fields: Your input fields should be intuitive. When someone taps the phone number field, the number pad should pop up. It's a small detail that makes a huge difference.
A clunky mobile checkout is one of the fastest ways to lose a sale. If the experience is frustrating, shoppers will simply leave and find a competitor with a smoother process.
Test Every Change in a Development Environment
I can't stress this enough: never push changes directly to your live checkout. The risk of breaking your payment flow or introducing a show-stopping bug is just too high. Always, always use a Shopify development store or a duplicate of your theme to test modifications in a safe, sandboxed environment first.
Your testing needs to be thorough. Go through the entire purchase flow just like a customer would. Try it with different products, apply a discount code, and test every payment method you offer. The goal here is to find the problems before your customers do.
Expert Tip: Your testing has to mimic real-world conditions. Don't just test in Chrome on your desktop. Open it up in Safari and Firefox, and on both iOS and Android devices. You’d be surprised how often something that works perfectly in one browser breaks in another.
A methodical QA process is your safety net. It ensures that when you do go live, the launch is smooth and error-free, protecting your revenue from an easily avoidable technical glitch. And if you're serious about boosting sales, our guide has more conversion rate optimization tips for Shopify that actually work.
Watch Your Page Speed and Performance
Every customization you add, whether it's a slick UI extension or a small custom script, adds a little more weight to your checkout page. It’s tempting to load it up with features, but you have to stay vigilant about performance.
A slow-loading checkout is a major cause of cart abandonment. Studies have shown that even a one-second delay can have a huge negative impact on your conversion rate.
Use tools like Google PageSpeed Insights to test your checkout speed before and after you implement any changes. If you find that a new feature is slowing things down, you have to ask yourself if it's truly worth it or if there’s a more optimized way to achieve the same result. Sometimes, the best checkout isn't the one with the most bells and whistles—it's the one that's the fastest.
Common Questions About Modifying the Shopify Checkout
When you start digging into Shopify checkout customizations, a lot of questions pop up pretty quickly. Let's tackle the most common ones I hear from merchants to give you some clear, direct answers.
Can I Modify the Checkout on a Basic Shopify Plan?
The short answer is no, not directly. If you're on a Basic, Shopify, or Advanced plan, you can't jump into the code of the live checkout flow. Shopify locks this down to maintain tight security and PCI compliance for every single store on its platform.
What you can do is tweak the look and feel—things like colors, fonts, and your logo—using the standard theme editor.
But don't let that stop you. A really effective strategy is to focus on what happens right after the customer pays. You can add a ton of value to the Thank You and Order Status pages with apps that enable order editing, address updates, or even post-purchase upsells.
What Is the Difference Between Checkout Extensibility and Checkout.liquid?
This is a big one, especially for anyone on Shopify Plus.
checkout.liquidis the old-school way. It gave you a single file with near-total control to edit the checkout's code. It was incredibly powerful, but also incredibly fragile. One wrong move or a Shopify platform update could break your entire checkout process.Checkout Extensibility is the modern framework Shopify built to replace it. Instead of direct code edits, you use apps and specific "extension points" to safely inject new features.
Think of it this way: Checkout Extensibility is stable, upgrade-safe, and plays nicely with crucial features like Shop Pay. It's the only path forward for anyone serious about modifying their Shopify checkout page today.
How Can I Add Upsells to My Shopify Checkout?
If you want to add upsells during the live checkout steps, you’ll need to be on Shopify Plus and build a custom solution using Checkout Extensibility. It’s a significant project but can be a powerful way to lift your average order value before the credit card is even charged.
For everyone else, the go-to strategy is post-purchase upsells. This is where you use an app to show one-click offers on the Thank You page, right after the original purchase is complete. It capitalizes on that high-intent moment without adding any friction or risk to the core payment process.
What Are the Risks of Editing the Shopify Checkout?
The real risks are almost exclusively tied to the old checkout.liquid method. When you’re directly editing a core file, it's easy to accidentally break payment processing, introduce a security hole, or have your customizations completely wiped out by a Shopify update.
The modern Checkout Extensibility framework was built specifically to mitigate these dangers. And if you're using vetted apps for post-purchase changes, the risk is practically zero. Since they operate after the secure transaction is already finished, they can't interfere with the checkout itself, making them a safe bet for adding powerful new features.
Are you tired of manually fixing shipping address typos and fielding endless "where is my order?" tickets? SelfServe empowers your customers with self-service order management tools right on the Thank You and Order Status pages. Reduce your support workload, prevent costly fulfillment errors, and boost revenue with post-purchase upsells. Start your free trial and see the difference at https://getselfserve.com.